Valentine’s Day Cherry Cheesecake Bars – Sweet, Simple, and Shareable
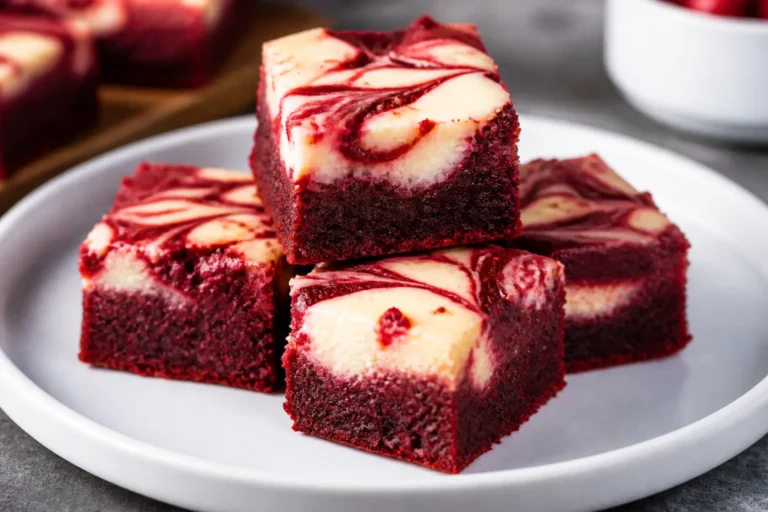
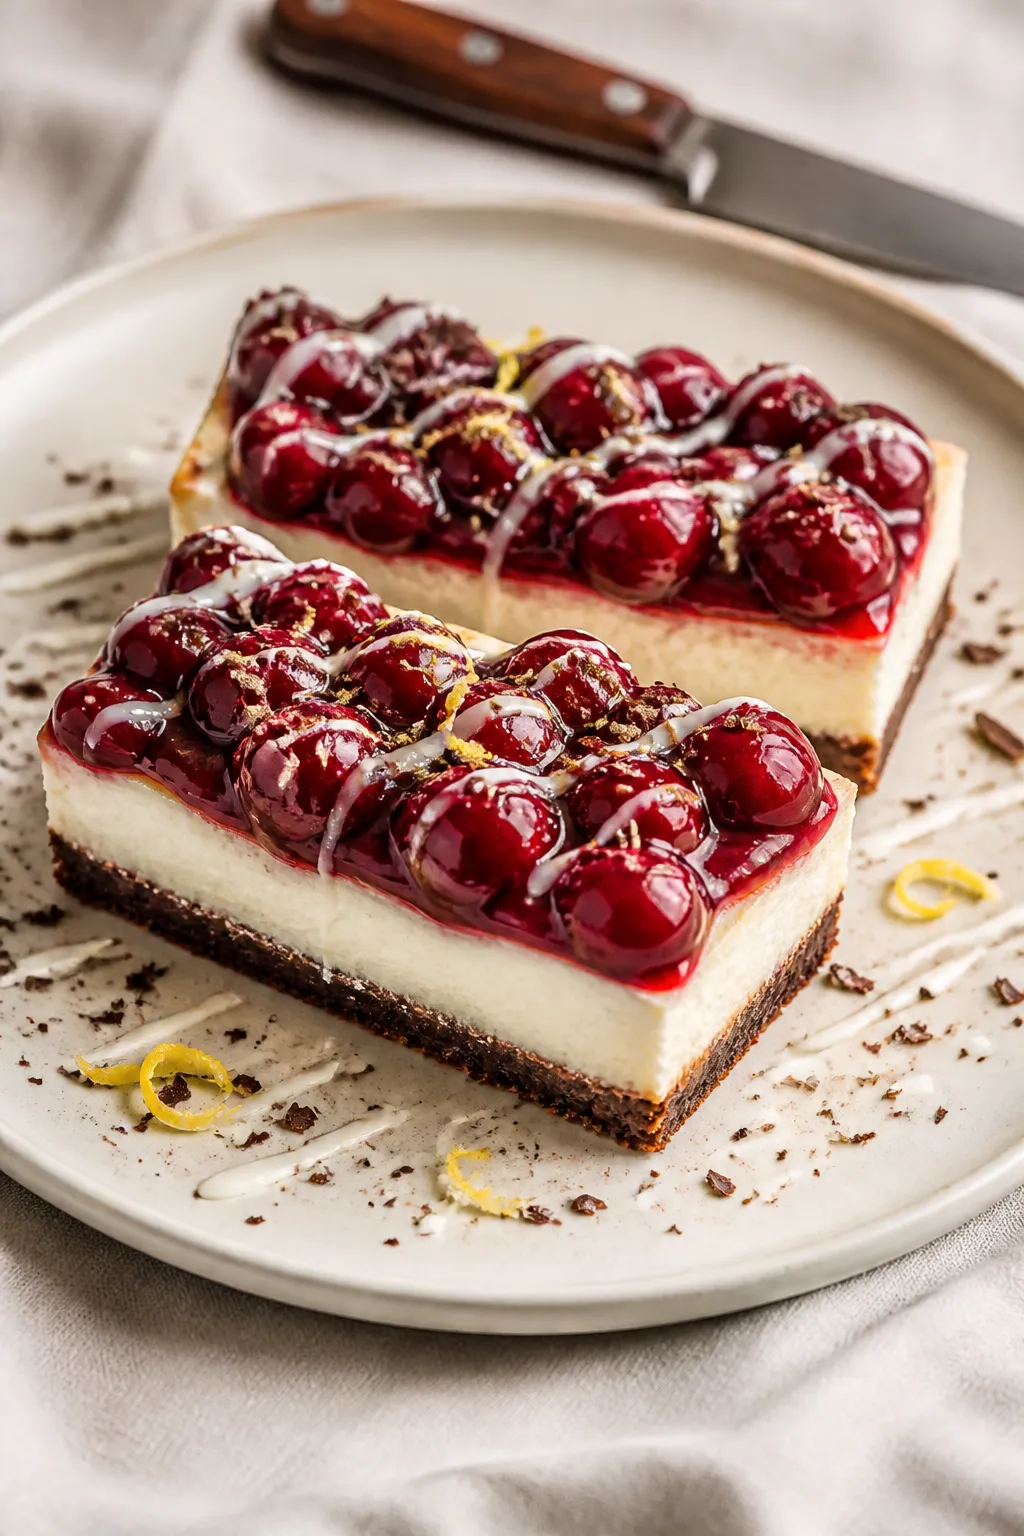
These cherry cheesecake bars bring all the romance of Valentine’s Day without the fuss of a fancy dessert. They’re creamy, tangy, and topped with a glossy cherry layer that looks as good as it tastes. The crust is buttery and just sweet enough, while the filling stays soft and velvety.
5 Irresistible Desserts, Completely Free
Get five easy dessert recipes you’ll want to save, share, and make again and again—delivered straight to your inbox.
They slice cleanly into bars, making them perfect for date night, a family treat, or sharing with friends. If you want a dessert that feels special but doesn’t require bakery-level skills, this is it.

Ingredients
Method
- Prep the pan and oven. Heat the oven to 325°F (163°C). Line a 9x13-inch pan with parchment, leaving overhang on the long sides so you can lift the bars out later.
- Make the crust. Stir together graham cracker crumbs, sugar, melted butter, and salt until the mixture resembles wet sand. Press firmly into the prepared pan, packing it tight and even. Use the bottom of a measuring cup for a smooth surface.
- Par-bake the crust. Bake for 8–10 minutes, until lightly fragrant. Set aside to cool slightly while you make the filling.
- Beat the cream cheese. In a large bowl, beat the softened cream cheese on medium speed until smooth and creamy, 1–2 minutes. Scrape the bowl to avoid lumps.
- Add sugar and flavorings. Beat in the sugar until combined, then add sour cream, vanilla, lemon juice, lemon zest (if using), and salt. Mix until silky and uniform.
- Mix in eggs. Add eggs one at a time on low speed, mixing just until incorporated. Do not overmix; too much air can cause cracks.
- Fill and bake. Pour the batter over the warm crust and smooth the top. Bake at 325°F (163°C) for 25–30 minutes, or until the edges are set and the center still has a slight wobble. The top should look matte, not wet.
- Cool gradually. Turn off the oven, crack the door, and let the pan sit for 10 minutes. Then remove to a cooling rack and cool to room temperature.
- Chill. Cover and refrigerate for at least 4 hours, preferably overnight. Chilling sets the texture and makes clean slices.
- Add the cherry topping. If using canned filling, gently spoon it over the chilled cheesecake in an even layer. For homemade: simmer cherries, sugar, and lemon juice for 4–6 minutes until juicy. Stir in the cornstarch slurry and cook 1–2 minutes more until glossy and thick. Cool completely before spreading on top.
- Garnish and serve. Drizzle with melted white chocolate or add sprinkles for a Valentine’s touch. Lift the bars out using the parchment and cut into squares or rectangles with a sharp knife. Wipe the blade between cuts for tidy edges.
What Makes This Special

There’s something timeless about cherry cheesecake, and these bars deliver that classic flavor in an easy-to-serve format. You get three great textures: a crisp graham cracker crust, a smooth cream cheese filling, and a bright, jammy cherry topping.
They bake in one pan and chill in the fridge—no springform pan, no water bath, no stress. Best of all, they’re make-ahead friendly, so you can prep them the night before Valentine’s Day and relax.
What You’ll Need
- For the crust:
- 1 1/2 cups graham cracker crumbs (about 10–12 full sheets)
- 1/4 cup granulated sugar
- 1/2 cup unsalted butter, melted
- Pinch of salt
- For the cheesecake filling:
- 16 oz cream cheese, softened to room temperature
- 2/3 cup granulated sugar
- 2 large eggs, at room temperature
- 1/3 cup sour cream
- 1 teaspoon pure vanilla extract
- 1 tablespoon lemon juice (fresh is best)
- 1 teaspoon lemon zest (optional but brightens the flavor)
- Pinch of salt
- For the cherry topping:
- 1 can (21 oz) cherry pie filling or
- 2 cups pitted cherries, 1/3 cup sugar, 1 tablespoon lemon juice, 1 tablespoon cornstarch mixed with 1 tablespoon water (for a quick homemade version)
- For garnish (optional): White chocolate drizzle, shaved chocolate, or heart-shaped sprinkles
- Tools: 9×13-inch baking pan, parchment paper, mixing bowls, electric mixer, spatula
Instructions

- Prep the pan and oven. Heat the oven to 325°F (163°C). Line a 9×13-inch pan with parchment, leaving overhang on the long sides so you can lift the bars out later.
- Make the crust. Stir together graham cracker crumbs, sugar, melted butter, and salt until the mixture resembles wet sand.
Press firmly into the prepared pan, packing it tight and even. Use the bottom of a measuring cup for a smooth surface.
- Par-bake the crust. Bake for 8–10 minutes, until lightly fragrant. Set aside to cool slightly while you make the filling.
- Beat the cream cheese. In a large bowl, beat the softened cream cheese on medium speed until smooth and creamy, 1–2 minutes.
Scrape the bowl to avoid lumps.
- Add sugar and flavorings. Beat in the sugar until combined, then add sour cream, vanilla, lemon juice, lemon zest (if using), and salt. Mix until silky and uniform.
- Mix in eggs. Add eggs one at a time on low speed, mixing just until incorporated. Do not overmix; too much air can cause cracks.
- Fill and bake. Pour the batter over the warm crust and smooth the top. Bake at 325°F (163°C) for 25–30 minutes, or until the edges are set and the center still has a slight wobble.
The top should look matte, not wet.
- Cool gradually. Turn off the oven, crack the door, and let the pan sit for 10 minutes. Then remove to a cooling rack and cool to room temperature.
- Chill. Cover and refrigerate for at least 4 hours, preferably overnight. Chilling sets the texture and makes clean slices.
- Add the cherry topping. If using canned filling, gently spoon it over the chilled cheesecake in an even layer.
For homemade: simmer cherries, sugar, and lemon juice for 4–6 minutes until juicy. Stir in the cornstarch slurry and cook 1–2 minutes more until glossy and thick. Cool completely before spreading on top.
- Garnish and serve. Drizzle with melted white chocolate or add sprinkles for a Valentine’s touch.
Lift the bars out using the parchment and cut into squares or rectangles with a sharp knife. Wipe the blade between cuts for tidy edges.
Storage Instructions
- Refrigerator: Store covered in the fridge for up to 5 days. Keep the topping on to prevent the cheesecake from drying out.
- Freezer: Freeze the bars without the cherry topping, tightly wrapped, for up to 2 months.
Thaw overnight in the fridge, then add topping before serving.
- Transport tips: Keep chilled until serving. For parties, cut the bars at home, then nestle them in a lidded container with parchment between layers.
Benefits of This Recipe
- Beginner-friendly: No water bath or special pan required. The bar format is forgiving and consistent.
- Make-ahead dessert: Chilling time works in your favor, so you can prep the day before and focus on the rest of your meal.
- Balanced flavor: A hint of lemon keeps the cheesecake bright, while the cherry layer adds color and tang.
- Easy to share: Bars are simpler to portion, pack, and serve than a traditional round cheesecake.
What Not to Do
- Don’t skip room temperature ingredients. Cold cream cheese or eggs cause lumps and overmixing.
- Don’t overbake. If the center is fully firm in the oven, the bars will be dry once chilled.
A little jiggle is ideal.
- Don’t spread hot topping on cold cheesecake. Warm cherry sauce can melt the surface and create a slippery layer. Let it cool first.
- Don’t rush the chill time. Cutting too soon leads to messy slices and a loose texture.
- Don’t neglect the parchment. Lining the pan helps you lift out cleanly and slice neatly.
Alternatives
- Crust swaps: Try chocolate wafer crumbs for a black-and-red Valentine’s look, or use vanilla wafer or shortbread crumbs for a sweeter base.
- Topping variations: Strawberry, raspberry, or mixed berry compote all work beautifully. For extra shine, warm a spoonful of jam and swirl it into the fruit.
- Lighter option: Use Neufchâtel (1/3 less fat cream cheese) and Greek yogurt in place of half the sour cream.
The texture stays creamy with a bit less richness.
- Gluten-free: Use gluten-free graham crackers or almond flour. If using almond flour, add an extra tablespoon of butter to help it bind.
- Mini versions: Bake in a lined muffin tin with paper liners. Reduce bake time to 15–18 minutes and top each mini with a spoonful of cherries.
FAQ
Your Next Favorite Dessert Is Inside
SEND ME THE FREE DESSERTS
How do I know when the cheesecake bars are done?
Look for set edges and a center that still jiggles slightly when you nudge the pan.
If the center looks glossy or wet, give it a few more minutes. Avoid baking until fully firm—the bars continue to set as they cool and chill.
Can I use frozen cherries?
Yes. Thaw the cherries and drain excess liquid before cooking your topping.
You may need a touch more cornstarch if the mixture seems thin; cook until thick and glossy.
What if I don’t have a mixer?
Use very soft cream cheese and whisk vigorously by hand, or use a sturdy spatula. Beat the cream cheese smooth before adding sugar and wet ingredients. Add the eggs last and stir gently to avoid excess air.
Why did my cheesecake crack?
Cracks usually come from overmixing, overbaking, or sudden temperature changes.
Mix on low once the eggs go in, bake just until slightly wobbly, and cool gradually with the oven door cracked before moving to the counter.
Can I make this the day of serving?
You can, but plan at least 4 hours for chilling. For the cleanest slices and best texture, overnight is ideal. If you’re short on time, chill in the coldest part of your fridge and avoid adding warm topping.
How do I cut perfect squares?
Lift the chilled slab out using the parchment.
Use a long, sharp knife, wiping the blade clean and warm between cuts. Mark the surface lightly to plan even portions before slicing.
Is there a way to reduce the sweetness?
Cut the crust sugar to 2 tablespoons and use a homemade cherry topping with less sugar. A squeeze of lemon over the cherries also balances sweetness without dulling the color.
Can I add chocolate?
Absolutely.
Fold 1/2 cup mini chocolate chips into the cheesecake filling or drizzle melted dark or white chocolate over the finished bars. A chocolate wafer crust is another easy upgrade.
In Conclusion
Valentine’s Day Cherry Cheesecake Bars are a low-effort, high-impact dessert that feels festive and tastes luxurious. With a buttery crust, a creamy center, and a glossy cherry crown, they strike the perfect balance of rich and bright.
Make them ahead, slice them clean, and share the love—no special equipment or pastry skills required. Once you try them, they just might become your new Valentine’s tradition.
Printable Recipe Card
Want just the essential recipe details without scrolling through the article? Get our printable recipe card with just the ingredients and instructions.
Save Room for Something Sweet
Before you go, grab five irresistible dessert recipes that are simple to follow, satisfying to make and perfect for sharing.