Christmas Tree Sugar Cookies – Soft, Buttery, and Festive
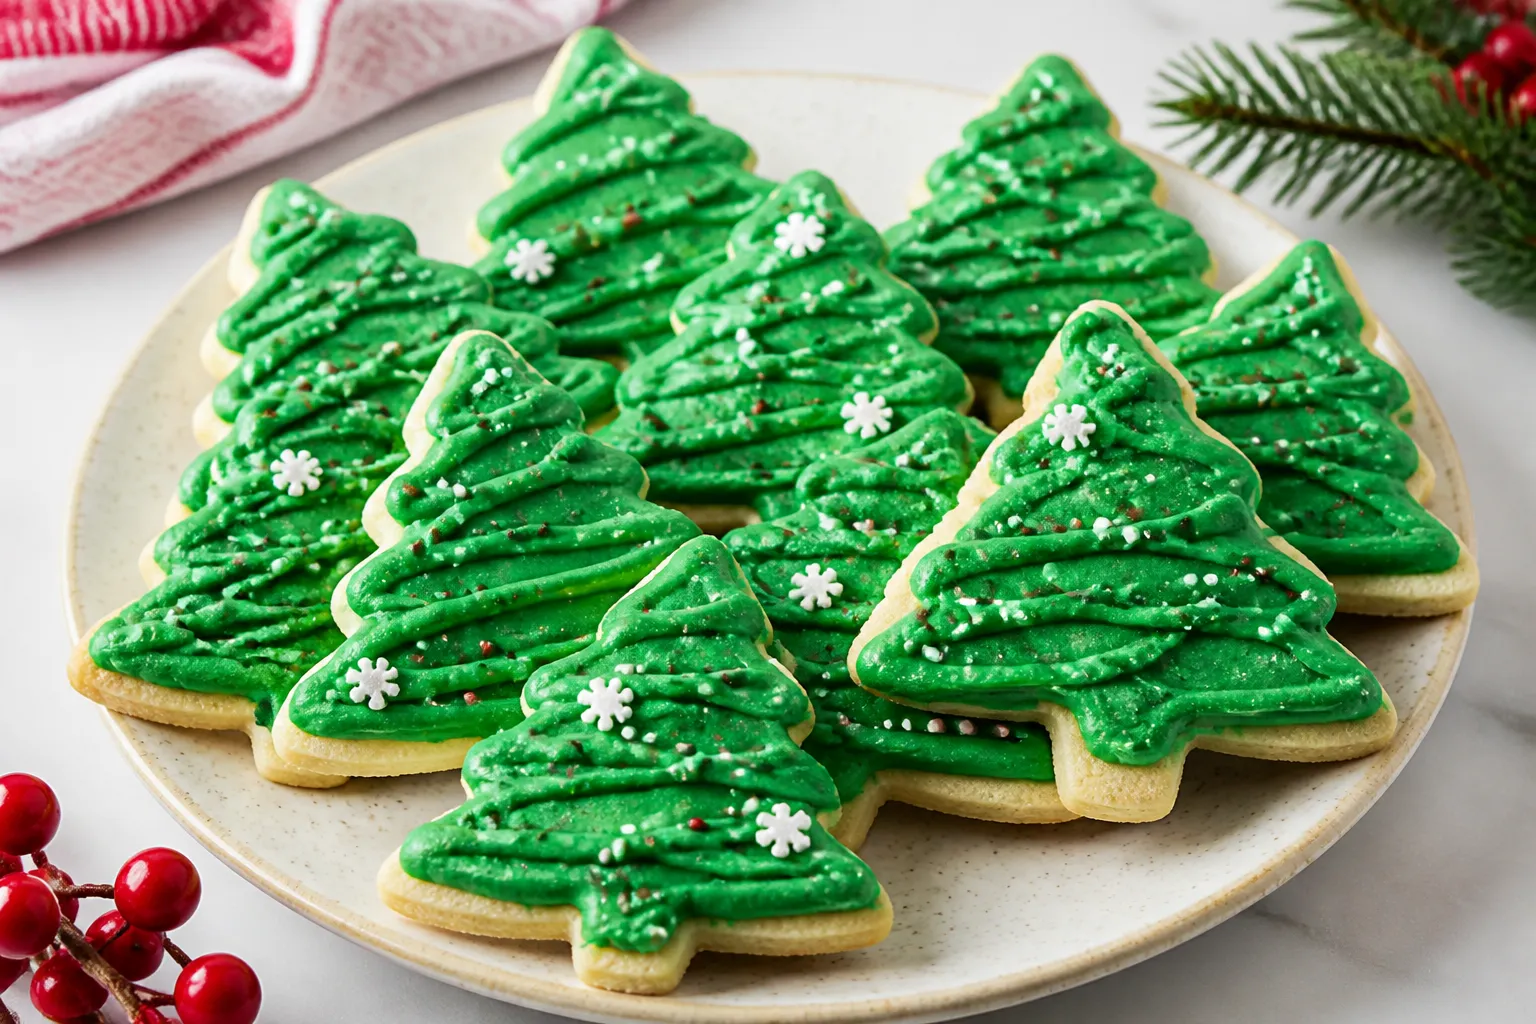
These Christmas Tree Sugar Cookies taste like pure holiday cheer—soft in the center, lightly crisp on the edges, and sweet without being cloying. The dough rolls out easily and holds its shape, so your trees look sharp and clean after baking. A simple vanilla icing adds that glossy, snowy finish, and a sprinkle of sanding sugar brings the sparkle.
5 Irresistible Desserts, Completely Free
Get five easy dessert recipes you’ll want to save, share, and make again and again—delivered straight to your inbox.
Whether you’re baking with kids, gifting to neighbors, or stocking the cookie plate, these cookies deliver the classic flavor everyone expects this time of year.
Ingredients
Method
- Whisk the dry ingredients. In a medium bowl, whisk together the flour, cornstarch, baking powder, and salt. Set aside.
- Cream butter and sugar. In a large bowl, beat the butter and granulated sugar on medium speed until light and slightly fluffy, about 2–3 minutes. Don’t overbeat; you want air, not whipped butter.
- Add eggs and flavoring. Beat in the egg and egg yolk until fully combined. Mix in the vanilla and almond extract.
- Combine wet and dry. Add the dry ingredients in two additions, mixing on low just until the dough comes together. It should be soft and not sticky.
- Chill the dough. Divide dough in half, flatten each into a disk, wrap tightly, and refrigerate for at least 1 hour (or up to 2 days). Chilled dough prevents spreading and makes rolling easier.
- Preheat and prep. Heat oven to 350°F (175°C). Line baking sheets with parchment paper.
- Roll and cut. On a lightly floured surface, roll one dough disk to about 1/4 inch thick. Dip the tree cutter in flour, then cut cookies close together. Transfer to the lined sheets, spacing about 1 inch apart. Gather scraps, chill briefly if warm, and reroll.
- Bake. Bake 9–11 minutes, until the edges look set and just barely golden on the bottom. The tops should stay pale. Cool on the baking sheet 5 minutes, then move to a rack to cool completely.
- Make the icing. In a bowl, whisk powdered sugar, 2 tablespoons milk, corn syrup, and vanilla until smooth. Add a tiny amount of green gel coloring until you reach a tree-green shade. Adjust consistency: add milk by the teaspoon for a flow that ribbons off the whisk and smooths in 10–15 seconds; add powdered sugar to thicken for outlining.
- Decorate. For neat edges, use a thicker icing to outline the tree, then thin icing to flood the center. Gently nudge icing into corners with a toothpick. Add sprinkles while the icing is wet. Let set at room temp until dry to the touch, 2–4 hours, or overnight for full set.
What Makes This Recipe So Good

- Soft and tender texture: A touch of cornstarch and the right butter-to-flour ratio keep the cookies melt-in-your-mouth soft.
- Cutout-friendly dough: The dough chills well and doesn’t spread, so your tree shapes stay crisp and defined.
- Balanced sweetness: The cookies are gently sweet, leaving room for icing without becoming overly sugary.
- Make-ahead friendly: The dough, baked cookies, and icing all store well, making holiday timing easier.
- Kid-approved decorating: Simple royal-style icing lets you outline, fill, and add sprinkles or tiny ornaments.
What You’ll Need
- For the cookies:
- 2 3/4 cups (345 g) all-purpose flour
- 2 tablespoons cornstarch
- 1/2 teaspoon baking powder
- 1/2 teaspoon fine sea salt
- 1 cup (226 g) unsalted butter, softened to cool room temperature
- 1 cup (200 g) granulated sugar
- 1 large egg, room temperature
- 1 large egg yolk, room temperature
- 2 teaspoons pure vanilla extract
- 1/2 teaspoon almond extract (optional, but lovely)
- For the icing:
- 2 cups (240 g) powdered sugar, sifted
- 2–3 tablespoons milk (plus more to thin)
- 1 tablespoon light corn syrup (for shine; optional)
- 1 teaspoon vanilla extract or 1/2 teaspoon almond extract
- Green gel food coloring
- For decorating:
- Sanding sugar, nonpareils, or small star sprinkles
- Piping bags or zip-top bags with small round tips
- Tree-shaped cookie cutter
Step-by-Step Instructions

- Whisk the dry ingredients. In a medium bowl, whisk together the flour, cornstarch, baking powder, and salt. Set aside.
- Cream butter and sugar. In a large bowl, beat the butter and granulated sugar on medium speed until light and slightly fluffy, about 2–3 minutes. Don’t overbeat; you want air, not whipped butter.
- Add eggs and flavoring. Beat in the egg and egg yolk until fully combined.
Mix in the vanilla and almond extract.
- Combine wet and dry. Add the dry ingredients in two additions, mixing on low just until the dough comes together. It should be soft and not sticky.
- Chill the dough. Divide dough in half, flatten each into a disk, wrap tightly, and refrigerate for at least 1 hour (or up to 2 days). Chilled dough prevents spreading and makes rolling easier.
- Preheat and prep. Heat oven to 350°F (175°C).
Line baking sheets with parchment paper.
- Roll and cut. On a lightly floured surface, roll one dough disk to about 1/4 inch thick. Dip the tree cutter in flour, then cut cookies close together. Transfer to the lined sheets, spacing about 1 inch apart.
Gather scraps, chill briefly if warm, and reroll.
- Bake. Bake 9–11 minutes, until the edges look set and just barely golden on the bottom. The tops should stay pale. Cool on the baking sheet 5 minutes, then move to a rack to cool completely.
- Make the icing. In a bowl, whisk powdered sugar, 2 tablespoons milk, corn syrup, and vanilla until smooth.
Add a tiny amount of green gel coloring until you reach a tree-green shade. Adjust consistency: add milk by the teaspoon for a flow that ribbons off the whisk and smooths in 10–15 seconds; add powdered sugar to thicken for outlining.
- Decorate. For neat edges, use a thicker icing to outline the tree, then thin icing to flood the center. Gently nudge icing into corners with a toothpick.
Add sprinkles while the icing is wet. Let set at room temp until dry to the touch, 2–4 hours, or overnight for full set.
How to Store
- Room temperature: Keep decorated or plain cookies in an airtight container for 4–5 days. Layer with parchment to protect icing.
- Refrigerator: Not necessary for the cookies.
If your kitchen is very warm, chilling can help the icing set, but condensation may dull the finish.
- Freezer (baked cookies): Freeze undecorated cookies up to 2 months. Thaw at room temperature before icing.
- Freezer (dough): Wrap dough disks well and freeze up to 2 months. Thaw in the fridge overnight, then roll and bake.
- Icing: Store leftover icing in an airtight container for 2–3 days at room temp or 1 week in the fridge.
Stir and adjust thickness before using.

Why This Is Good for You
- Mindful sweetness: These cookies satisfy a holiday craving without heavy frostings or cloying fillings, so a small portion goes a long way.
- Simple, recognizable ingredients: Butter, flour, sugar, and vanilla—no mystery additives—make it easier to know what you’re eating.
- Holiday connection: Baking together fosters tradition and lowers stress. A cozy kitchen session can feel as nourishing as the food itself.
- Customizable: You control icing and decorations, from lighter glazes to naturally colored sugars, to fit your preferences.
Common Mistakes to Avoid
- Skipping the chill: Warm dough spreads, blurs edges, and bakes unevenly. Chill at least 1 hour.
- Overbaking: Pull cookies when edges are set and bottoms are light golden.
They’ll continue to firm as they cool.
- Too much flour on the board: Excess flour toughens dough. Lightly dust, or roll between parchment sheets.
- Overmixing the dough: Mixing past the point of just combined can develop gluten and make cookies chewy.
- Icing too runny or too thick: Test flow on parchment. It should settle smooth in about 10–15 seconds for flooding.
Variations You Can Try
- Lemon vanilla: Add 1 teaspoon lemon zest and swap almond extract for 1/2 teaspoon lemon extract for a bright, festive spin.
- Spiced tree cookies: Add 1/2 teaspoon ground cinnamon and a pinch of nutmeg to the dry mix for warm, cozy flavor.
- Chocolate-dipped edges: Dip cooled tree tips or trunks in melted dark chocolate and sprinkle with crushed peppermint.
- Gluten-free version: Use a 1:1 gluten-free baking blend with xanthan gum.
Chill well and roll slightly thicker for stability.
- Colored dough: Tint a small portion of dough green, cut star “ornaments,” and press gently onto plain trees before baking.
FAQ
Your Next Favorite Dessert Is Inside
SEND ME THE FREE DESSERTS
Can I make the dough ahead of time?
Yes. The dough keeps in the fridge for up to 48 hours or in the freezer for up to 2 months. Let refrigerated dough sit at room temperature for 10–15 minutes before rolling if it’s very firm.
How do I keep the cookies from spreading?
Chill the dough, don’t over-cream the butter and sugar, and bake on cool, parchment-lined sheets.
If your kitchen is warm, chill cut cookies on the tray for 10 minutes before baking.
What if I don’t have corn syrup for the icing?
You can skip it. Corn syrup adds shine and a slightly softer bite, but the icing will still set without it. Adjust milk to reach a smooth, pourable consistency.
Can I use buttercream instead of glaze?
Absolutely.
A simple American buttercream pipes beautifully for garlands and ornaments. Keep layers thin so the cookies don’t become too sweet or soft.
How thick should I roll the dough?
Aim for about 1/4 inch. Thinner cookies bake crisp and can brown too fast, while thicker ones may lose their shape.
Consistency helps them bake evenly.
Do I need a stand mixer?
No. A hand mixer works well. You can mix by hand with a sturdy spatula, but creaming the butter and sugar will take more effort.
Can I color the icing different shades of green?
Yes.
Divide the icing and tint each portion slightly differently. Layering a darker outline with a lighter fill gives a lovely tree effect.
How long does the icing take to dry?
Surface dry in 2–4 hours, depending on humidity. For fully set icing that stacks cleanly, let them dry uncovered overnight.
Wrapping Up
These Christmas Tree Sugar Cookies are everything you want in a holiday bake: simple to make, easy to decorate, and reliably delicious.
The dough behaves, the shapes stay sharp, and the icing adds just the right sparkle. Bake a batch now, stash some for later, and enjoy the small tradition that makes the season feel special. Happy baking, and don’t forget the sprinkles.
Printable Recipe Card
Want just the essential recipe details without scrolling through the article? Get our printable recipe card with just the ingredients and instructions.
Save Room for Something Sweet
Before you go, grab five irresistible dessert recipes that are simple to follow, satisfying to make and perfect for sharing.


