Red Velvet Oreo Cheesecake Bars – Creamy, Crunchy, and Crowd-Pleasing
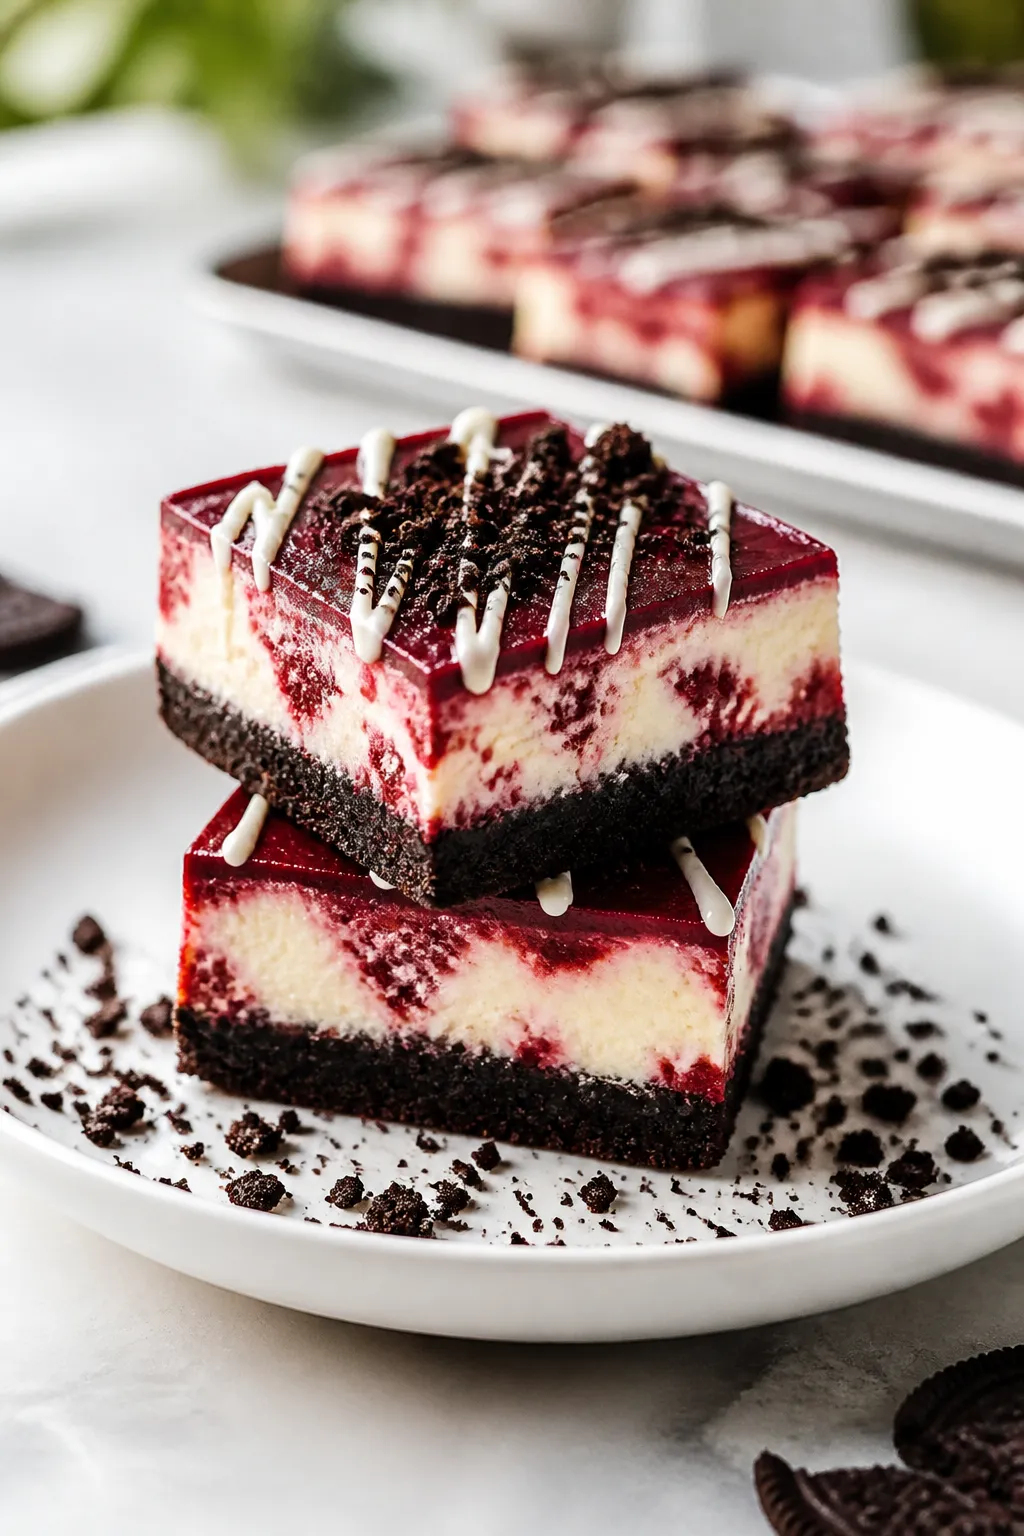
Red Velvet Oreo Cheesecake Bars are the kind of dessert that makes people hover near the table for “just one more piece.” You get the deep cocoa notes of red velvet, the crunch of Oreos, and a silky cheesecake layer that ties it all together. They look festive, slice neatly, and travel well, which makes them a go-to for parties or potlucks. Best of all, the steps are simple and the ingredients are easy to find.
5 Irresistible Desserts, Completely Free
Get five easy dessert recipes you’ll want to save, share, and make again and again—delivered straight to your inbox.
If you’re craving something rich, pretty, and reliable, this recipe checks every box.

Ingredients
Method
- Prep the pan: Line a 9x13-inch baking pan with parchment, leaving overhang on two sides for easy lifting. Lightly grease the sides. Preheat oven to 325°F (163°C).
- Make the crust: Crush Oreos into fine crumbs in a food processor or by sealing them in a bag and rolling with a pin. Mix crumbs with melted butter until it looks like damp sand.
- Press and pre-bake: Firmly press the crumb mixture into the pan in an even layer. Bake for 10 minutes, then set aside to cool slightly.
- Beat the cream cheese: In a large bowl, beat softened cream cheese with sugar and a pinch of salt on medium speed until smooth and fluffy, about 2–3 minutes. Scrape down the bowl as needed.
- Add flavor and color: Mix in sour cream, vanilla, and cocoa powder until combined. Add red food coloring a little at a time until you reach a bold red velvet shade.
- Add the eggs: Beat in eggs one at a time on low speed just until incorporated. Do not overmix; this keeps the cheesecake tender and helps prevent cracks.
- Optional crunch: Fold in a handful of chopped Oreos for extra texture, keeping the batter streak-free.
- Assemble: Pour the red velvet cheesecake batter over the pre-baked crust. Smooth the top with an offset spatula.
- Bake: Bake at 325°F (163°C) for 30–36 minutes, until edges are set and the center has a slight jiggle. Avoid overbaking.
- Cool gradually: Turn off the oven, crack the door, and let the pan sit for 10 minutes. Move to a cooling rack and cool to room temperature.
- Chill to set: Cover and refrigerate for at least 4 hours, preferably overnight. This firms the bars and improves the flavor.
- Slice and serve: Lift the slab out by the parchment. Warm a sharp knife under hot water, wipe dry, and cut into neat squares. Garnish with Oreo crumbs or a white chocolate drizzle if you like.
What Makes This Recipe So Good

- Two textures in one bite: Buttery Oreo base with a creamy cheesecake topping for perfect contrast.
- Eye-catching color: That classic red velvet hue looks stunning against the cookie crust.
- Fuss-free baking: No water bath needed. A standard 9×13-inch pan works beautifully.
- Make-ahead friendly: These bars set up best after chilling, which means you can bake ahead of time.
- Great for sharing: Clean slices and sturdy structure make these bars easy to pack, plate, and serve.
Shopping List
- Oreos: Regular, not Double Stuf (about 36 cookies)
- Unsalted butter: Melted, for the crust
- Cream cheese: Full-fat bricks, softened (24 ounces total)
- Granulated sugar
- Sour cream: Full-fat for best texture
- Eggs: Large
- Vanilla extract
- Cocoa powder: Unsweetened, natural
- Red food coloring: Liquid or gel
- Salt
- Optional add-ins: Extra chopped Oreos for folding or topping, white chocolate for drizzle
How to Make It

- Prep the pan: Line a 9×13-inch baking pan with parchment, leaving overhang on two sides for easy lifting. Lightly grease the sides.
Preheat oven to 325°F (163°C).
- Make the crust: Crush Oreos into fine crumbs in a food processor or by sealing them in a bag and rolling with a pin. Mix crumbs with melted butter until it looks like damp sand.
- Press and pre-bake: Firmly press the crumb mixture into the pan in an even layer. Bake for 10 minutes, then set aside to cool slightly.
- Beat the cream cheese: In a large bowl, beat softened cream cheese with sugar and a pinch of salt on medium speed until smooth and fluffy, about 2–3 minutes.
Scrape down the bowl as needed.
- Add flavor and color: Mix in sour cream, vanilla, and cocoa powder until combined. Add red food coloring a little at a time until you reach a bold red velvet shade.
- Add the eggs: Beat in eggs one at a time on low speed just until incorporated. Do not overmix; this keeps the cheesecake tender and helps prevent cracks.
- Optional crunch: Fold in a handful of chopped Oreos for extra texture, keeping the batter streak-free.
- Assemble: Pour the red velvet cheesecake batter over the pre-baked crust.
Smooth the top with an offset spatula.
- Bake: Bake at 325°F (163°C) for 30–36 minutes, until edges are set and the center has a slight jiggle. Avoid overbaking.
- Cool gradually: Turn off the oven, crack the door, and let the pan sit for 10 minutes. Move to a cooling rack and cool to room temperature.
- Chill to set: Cover and refrigerate for at least 4 hours, preferably overnight.
This firms the bars and improves the flavor.
- Slice and serve: Lift the slab out by the parchment. Warm a sharp knife under hot water, wipe dry, and cut into neat squares. Garnish with Oreo crumbs or a white chocolate drizzle if you like.
Storage Instructions
- Refrigerator: Store in an airtight container for up to 5 days.
Keep layers separated with parchment if stacking.
- Freezer: Freeze slices on a sheet until firm, then wrap individually and place in a freezer bag. Freeze up to 2 months. Thaw in the fridge overnight.
- Serving from cold: For the best texture, let bars sit at room temperature for 10–15 minutes before serving.
Why This is Good for You
- Portion control built in: Bars offer smaller servings than a whole cheesecake, which helps with mindful eating.
- Protein and calcium: Cream cheese and sour cream contribute modest protein and calcium.
- Mood-boosting treat: Enjoying dessert at celebrations can support a balanced, joyful approach to food.
- Make-ahead ease: Planning dessert in advance reduces stress and last-minute scrambling, which is good for your sanity.
Common Mistakes to Avoid
- Overmixing the batter: Too much air leads to cracks.
Mix on low once the eggs go in.
- Skipping the chill: Warm bars won’t slice cleanly. Chill fully for sharp edges and the right texture.
- Overbaking: Pull the pan when the center still has a soft jiggle. The bars will finish setting as they cool.
- Uneven crust: Press firmly and evenly so the base doesn’t crumble or bake patchy.
- Using cold cream cheese: This creates lumps.
Soften it at room temperature for about 1 hour before mixing.
Variations You Can Try
- Marble swirl: Reserve 1 cup of batter, leave it uncolored, and swirl it into the red layer with a knife.
- Double chocolate: Scatter mini chocolate chips over the crust before adding the batter.
- Mint twist: Add 1/2 teaspoon peppermint extract to the batter and top with crushed mint Oreos.
- Gluten-free: Use gluten-free chocolate sandwich cookies for the crust. Ensure other ingredients are certified GF.
- White chocolate drizzle: Melt white chocolate with a touch of coconut oil and drizzle over cooled bars.
- Mini versions: Line a muffin tin and bake individual cups for 16–20 minutes.
FAQ
Do I have to use red food coloring?
Your Next Favorite Dessert Is Inside
SEND ME THE FREE DESSERTS
You can skip it, but you’ll lose the classic look. The flavor stays the same.
If you prefer natural color, try a beet-based gel, though the shade will be softer.
Can I use Greek yogurt instead of sour cream?
Yes. Use full-fat Greek yogurt for a similar texture. The flavor is slightly tangier, which actually works nicely here.
What cocoa powder works best?
Natural unsweetened cocoa powder gives you that gentle chocolate note typical of red velvet.
Dutch-process will be richer and slightly darker, which is fine if that’s your preference.
How do I know when the bars are done?
The edges should look set, and the center should wobble slightly when you nudge the pan. If the entire surface is firm, they’re likely overbaked.
Can I make these without a food processor?
Absolutely. Crush the Oreos in a zip-top bag with a rolling pin until very fine.
Mix with melted butter in a bowl and proceed as usual.
My bars cracked. What happened?
Cracks usually come from overmixing, overbaking, or cooling too quickly. They’re still tasty, but next time mix gently, watch the jiggle, and cool gradually.
What size pan should I use?
A standard 9×13-inch pan is ideal.
If you use a smaller pan, add a few minutes to the bake time and check for that soft jiggle in the center.
Can I add more Oreos on top?
Yes. Sprinkle chopped Oreos over the batter before baking or press them gently into the surface after 10 minutes of baking so they stay crisp but set in.
In Conclusion
Red Velvet Oreo Cheesecake Bars bring together bold color, rich flavor, and a satisfying crunch in every square. They’re simple to make, easy to share, and impressive on any dessert table.
With a little chill time and a few smart tips, you’ll get clean slices and a silky bite every time. Bake a batch, stash a few in the fridge, and enjoy sweet, reliable treats all week long.
Printable Recipe Card
Want just the essential recipe details without scrolling through the article? Get our printable recipe card with just the ingredients and instructions.
Save Room for Something Sweet
Before you go, grab five irresistible dessert recipes that are simple to follow, satisfying to make and perfect for sharing.